Multi Sub-objects

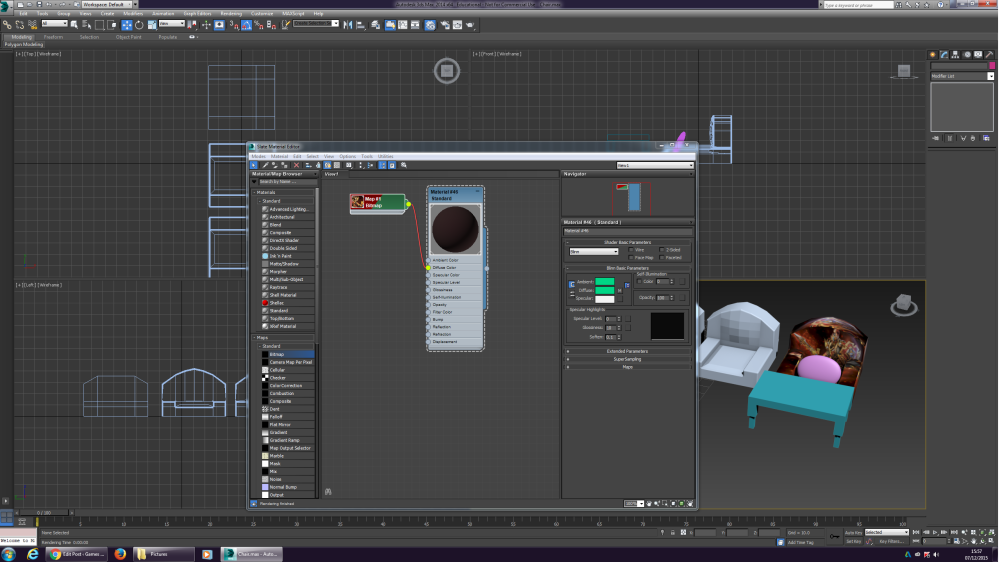
Today I continued working on 3D Max creating a couch but adding more textures and here’s how I did it.  I first made a couch like I did yesterday and after I made the couch I went into slate material editor to add the certain textures I wanted.

I then used the Multi Sub-object material and split the couch into two groups the main body being group one and only the couch legs being group two, In group one I added a standard texture (Black Leather) using a bitmap, after I added another standard texture the colour brown with wooden textures to the couch legs to give the couch a better look to it, I also had two cushions which I gave a standard texture yellow. Multi Sub-Object


UVW textures

Here is my screenshot of the texture I have applied to the couch I made in 3D Max It is a image of a hero from a game and below is how I did it I first used a standard material and applied a background colour  and used the bitmap to add the image. Untitled.png

3D Modelling

In today’s lesson we made a single seat couch starting off with the Box as usual we then connected certain lines to outline where the arm rests and the back rest will be, after we extruded all the outlines to a reasonable height and ended up with the basic design of the couch so far.

After making the basic couch we then made clones of the couch at least three clones the second couch was cloned for the detail for the back rest and arm rests, on the next clone we started to curve the couch and give it more of a realistic look to it by using many different techniques on 3D Max such as.

Techniques :

Connect, Extrude, Inset, Bevel, Rotate, Soft selection, Chamfer, M smooth

After the main look of the couch was done I started added a lot of detail on the third and fourth clone further improving its style and design.

This slideshow requires JavaScript.

3D Modelling / Self Assessments

During this lesson we were asked to make a tap on 3D Max, to do so we must first make a pillar using the box tool, I then went on the slice the box in the appropriate places using slice plane. I also used many other tools such as extrude, inset to make it look more realistic after making the tap with little detail I went on and made 2 more copy’s of the tap to add two different versions of a smoothing tool such as M Smooth and Auto Smooth. too round up the rough corners and make the final 2 designs more realistic and more professional.

This slideshow requires JavaScript.

The first image is my initial design only using the box tool and adding detail, then the second image has the first smooth tool auto smooth which make the corners and edges on the tap more rounded and have a smoother look. The last tap is the final design using the M smooth which adds a lot of polygons but has the smoothest effect.